Working with transactions
In this tutorial, you'll learn to interact with Microblink Platform API endpoints, to create transactions, progress them throughout the workflow, and to perform other useful things over the API.
This tutorial assumes the following:
- You already have an account set up. If not, see account setup.
- You have an authentication token. If not, follow the instructions for getting an access token in the Authentication article.
SDK integration is not required, as all examples use direct curl calls.
Before you start, it's useful to read the API intro section.
Intro
The platform uses two different APIs: an Agent API and an Edge API.
The Agent API is used to initially create the transaction, and to access transaction history and analytics for a user account.
The Edge API is used to progress an individual transaction.
In production environments, your end users (mobile apps, clients) will first contact the Agent API (through some sort of proxy service, or proxy-like code under your control).
The Agent API will respond with further instructions, specifically where the client should continue with the transaction. This continuation (actually progressing the transaction throughout the workflow steps) is performed via the Edge API.
Visually:
Build a workflow to test
For this tutorial, we'll create the simplest possible workflow: one in which the user passes some data in the start node.
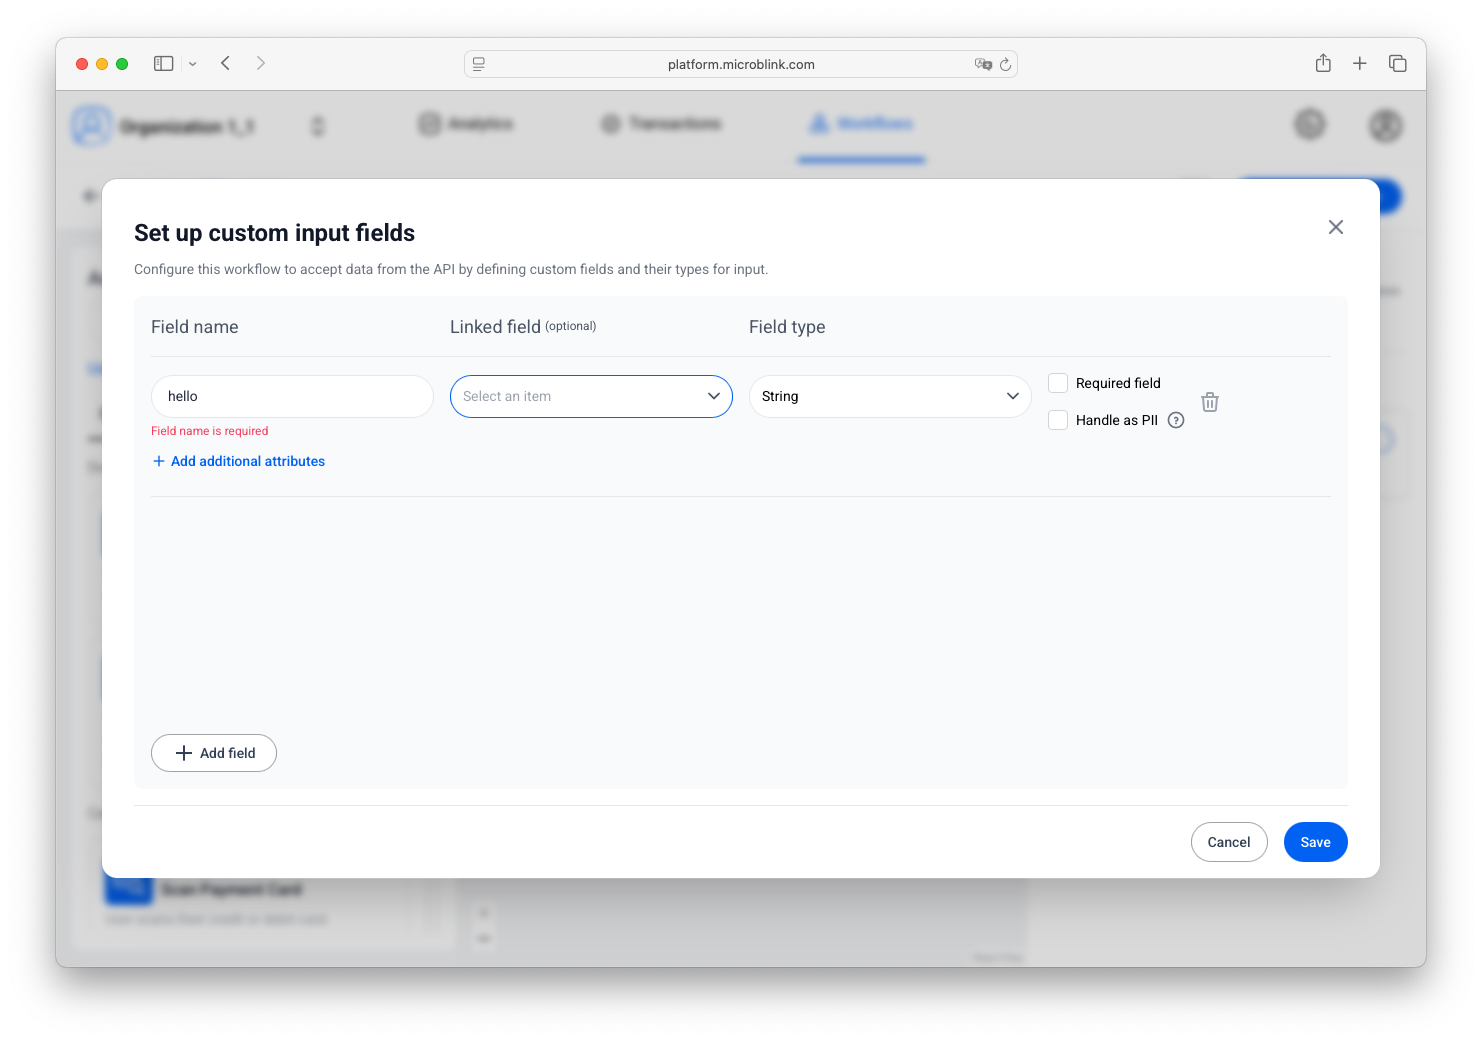
Follow the instructions from Build your workflow, but don't add any additional capability. Configure the start node to expect exactly one field called "hello", like so:
Create your first transaction
Authenticate your request to the Agent API
As mentioned in the beginning, one of the requirements of this tutorial is that you have an authentication token. If you don't yet have one, follow the instructions in Authentication.
Now, save that token in an environment variable:
export ACCESS_TOKEN="eyJhbGciOiJSUzI1NiIsInR5cCI6IkpXVCI..." #cropped for readability
Create a request to start a transaction
Now, start a transaction that uses your workflow. You need to get the workflow ID
from the Platform web interface. It's going to look something like this:
6870ca44335606082bb4bf90.
JSON payload
You also need to have a JSON payload. We'll use curl and a separate JSON file to
make things more readable.
Create your JSON file and name it request_body.json (or another descriptive name):
{
  "workflowId": "6870ca44335606082bb4bf90",
  "platform": "browser",
  "sdkVersion": "1.4.0",
  "formValues": {
    "hello": "world" // we're passing "world" to the declared "hello" field
  },
  "consent": {
    "userId": "unique-user-id",
    "givenOn": "2025-08-29T09:00:00",
    "isProcessingStoringAllowed": true,
    "isTrainingAllowed": true
  }
}
All of the above fields are required. We won't discuss the individual meaning of them in this tutorial, but to learn more, see our API reference.
Running the first request
Now, run your request.
curl --url https://api.us-east.platform.microblink.com/agent/api/v1/transaction --oauth2-bearer $ACCESS_TOKEN --json @request_body.json | jq
The response will look like this:
{
  "transactionId": "0168b58c71fa53b5c88c0caedd",
  "workflowId": "6870ca44335606082bb4bf90",
  "workflowVersionId": "68b58647b84a9097911b3f30",
  "organizationId": "66d99fa9edc165df54072f8c",
  "ephemeralKey": "qRqL.Mu2rINe835hF6MweR5AUw_j..." // cropped
  "authorization": "MDE2OGI1OGM3MWZhNTNiNWM4OGM..." // cropped
  "workflowInfo": {
    "stepCount": 2,
    "interactiveStepCount": 0,
    "hasConditionalInteractiveStep": false,
    "interactiveSteps": [],
    "completedInteractiveSteps": [],
    "currentStep": "End",
    "currentStepRetryCount": 0,
    "currentStepExecutionIndex": 1,
    "steps": [],
    "currentStepId": 2,
    "pendingStepIds": [],
    "completedStepIds": []
  },
  "createdOn": "2025-09-01T12:07:13.9506202Z",
  "modifiedOn": "2025-09-01T12:07:13.9511885Z",
  "processingStatus": "InProgress",
  "warnings": [],
  "edgeApiUrl": "https://api.us-east.platform.microblink.com/edge"
}
A couple of things have happened now:
- We now have a new transaction with its own transaction ID.
- We have received an ephemeral key which we will use to continue this transaction.
- We can see that the processing status is
InProgress(the transaction is not yet completed). - Finally, we have received a URL (
edgeApiUrl) at which we will complete the transaction.
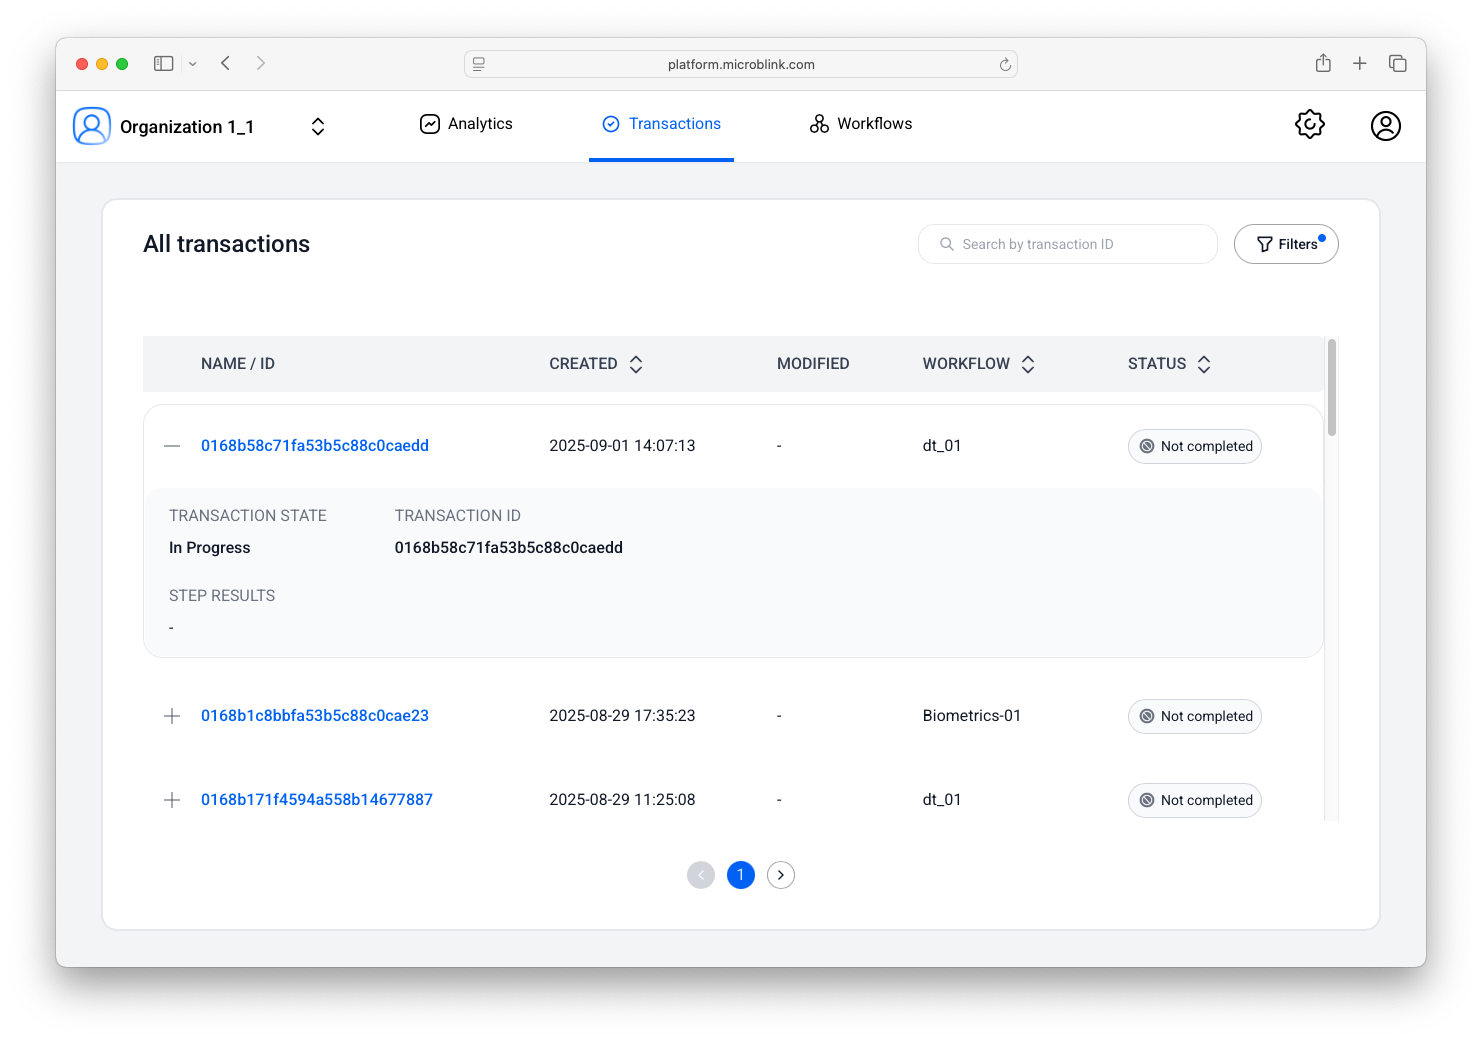
In our web interface, in the "Transactions" tab, we can see that a transaction has been created, but has not yet been completed:
Complete the created transaction
Now, to complete the transaction, we must contact the Edge API.
A note on production environments
Most production environments should not use direct API access to the Edge API. Instead, client libraries (mobile and web SDKs) are the preferred way as they are preconfigured to work with individual capabilities, and each capability has its own request/response schema.
However, to illustrate how the API works, we will continue using direct curl calls
even when contacting the Edge API.
Authorize your request to the Edge API
We will authenticate using the transaction ID and ephemeral key received in the previous response.
The HTTP authorization header should be set like so:
Authorization: Basic <base64(transactionId:ephemeralKey)>
Running the second request
We will use the Edge API URL received from the previous response and append the full
path for resuming transactions: /api/v1/transaction/{transactionId}/resume.
Putting it all together, we run this curl example:
curl --request POST --user "<your transaction ID>:<your ephemeral key>" --url "https://api.us-east.platform.microblink.com/edge/api/v1/transaction/<your transaction id>/resume" | jq
When the transaction is complete, the response from the "resume" endpoint returns either "Complete" or "Error", as highlighted below:
{
  "transactionId": "0168b58c71fa53b5c88c0caedd",
  "isChanged": true,
  "processingStatus": "Complete",
  "verificationStatus": "Accept",
  "workflowInfo": {
    "stepCount": 2,
    "interactiveStepCount": 0,
    "hasConditionalInteractiveStep": false,
    "interactiveSteps": [],
    "completedInteractiveSteps": [],
    "currentStep": "End",
    "currentStepRetryCount": 0,
    "currentStepExecutionIndex": 1,
    "steps": [],
    "currentStepId": 2,
    "pendingStepIds": [],
    "completedStepIds": []
  },
  "hasConsent": true
}
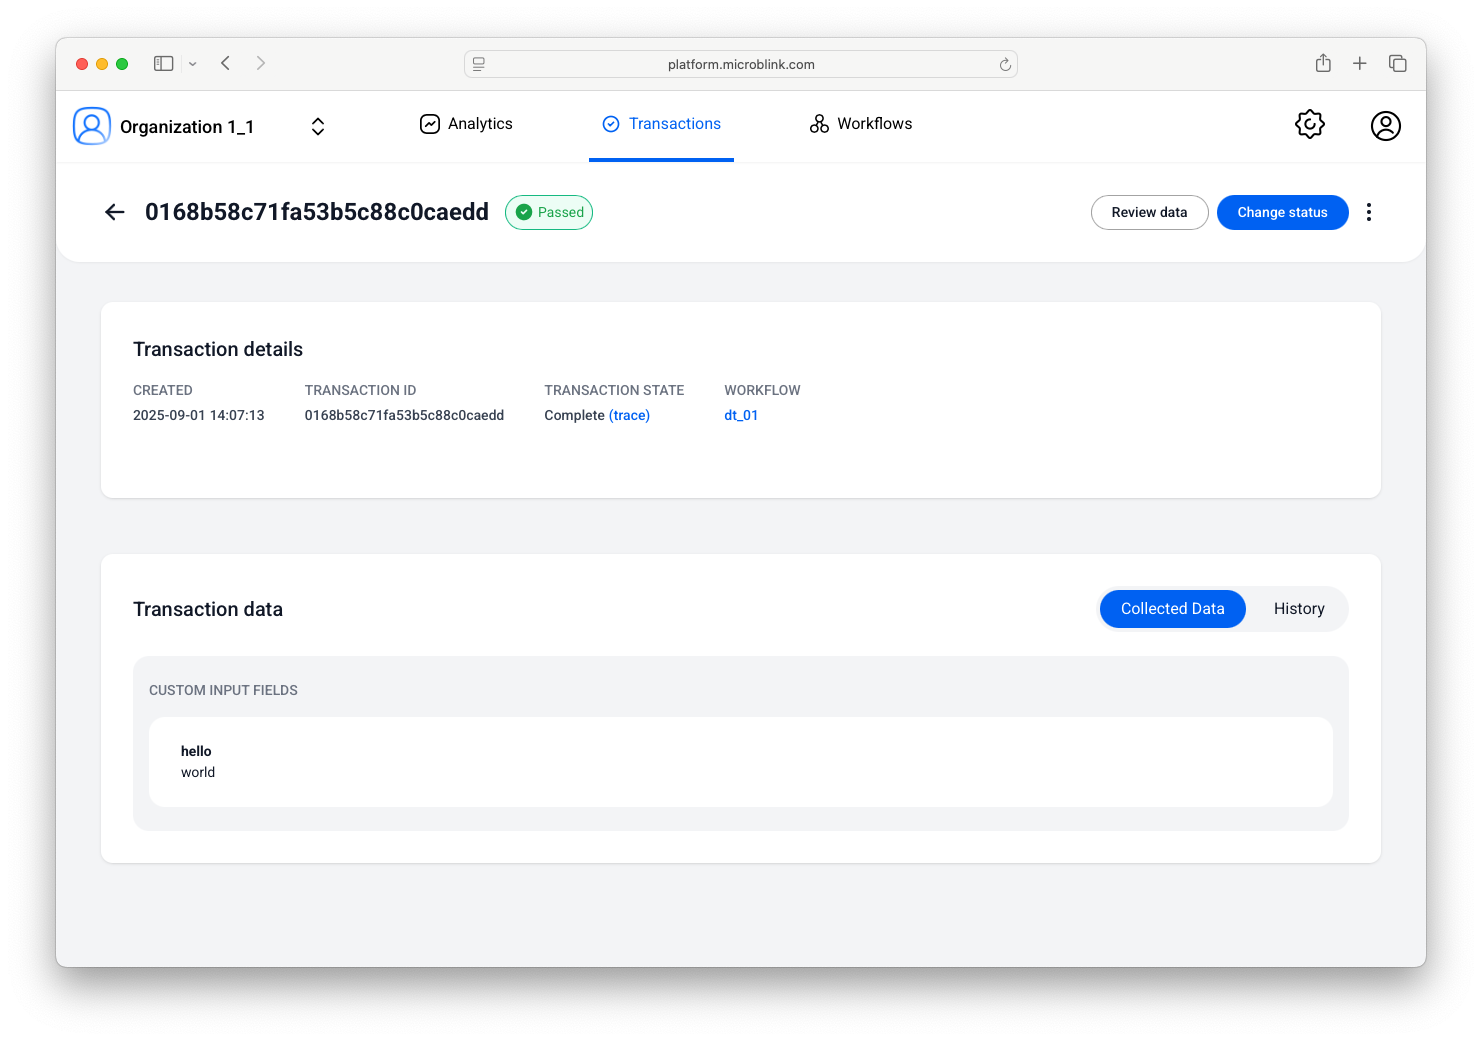
You will see that same transaction in the web UI now display as completed:
Access a transaction
You can access a transaction at any point after it has been created, even during its execution, for example:
curl --url "https://api.us-east.platform.microblink.com/agent/api/v1/transaction/<transaction_id>" --oauth2-bearer $ACCESS_TOKEN
The response is a JSON object with information about that specific transaction:
{
  "id": "0168b58c71fa53b5c88c0caedd",
  "workflowId": "6870ca44335606082bb4bf90",
  "workflowVersionId": "68b58647b84a9097911b3f30",
  "partnerId": "66d99fa9edc165df54072f8a",
  "companyId": "66d99fa9edc165df54072f8b",
  "organizationId": "66d99fa9edc165df54072f8c",
  "platform": "Browser",
  "sdkVersion": {},
  "createdOn": "2025-09-01T12:07:13.95Z",
  "modifiedOn": "2025-09-01T14:10:13.999Z",
  "processingStatus": "Complete",
  "verificationStatus": "Accept",
  "originalVerificationStatus": "Accept",
  "statusLog": [],
  "state": {},
  "tags": [],
  "linkFields": {},
  "consent": {}
}
This is a shortened version, and the complete transaction schema is available in the API reference.
The full object keeps record of all states, events, and changes, and is therefore a useful method to
Update verification status
You can also update the verification outcome for completed transactions.
curl --request PUT --url https://api.us-east.platform.microblink.com/agent/api/v1/transaction/<transaction_id>/verification-status --oauth2-bearer $ACCESS_TOKEN --json '{"verificationStatus": "Reject","comment": "My manual update"}'
The verificationStatus is a mandatory field, and possible values are:
AcceptRejectReview
Changing this value doesn't affect the originalVerificationStatus field, which will
always reflect the status set at workflow completion time.
The comment field is optional and can provide context as to why an update was made.
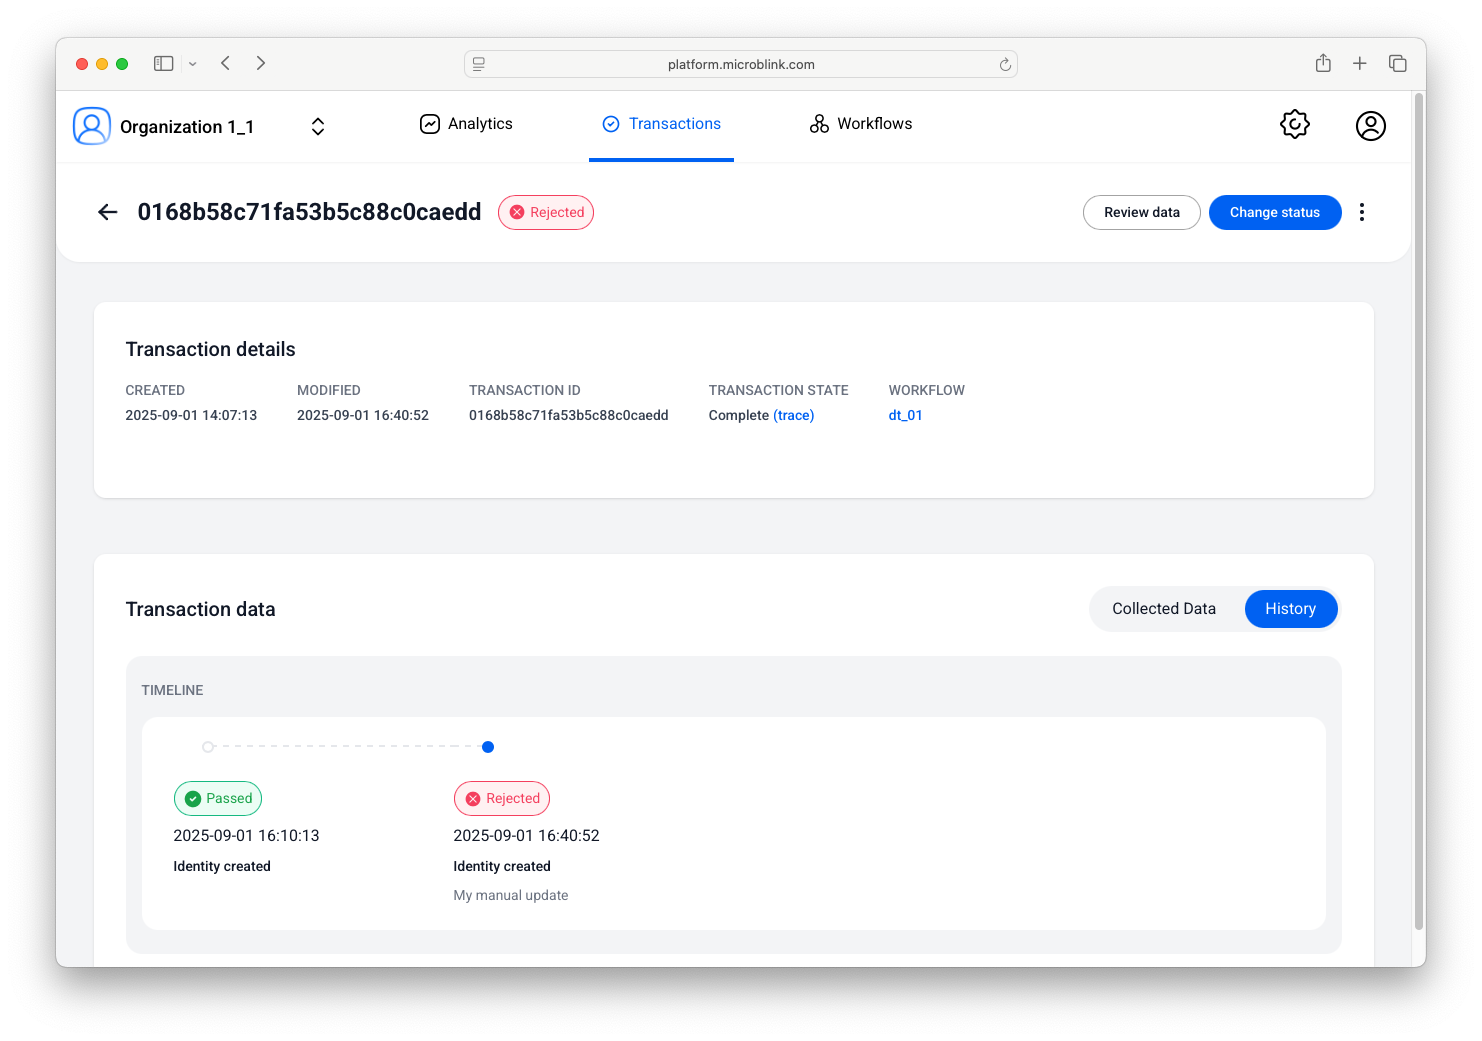
You can see the result of this manual update in the UI:
Delete a transaction
Finally, you can delete a transaction. It is only possible to delete a transaction after it's been completed. While being executed, transactions are locked for deletion.
curl --request DELETE --oauth2-bearer $ACCESS_TOKEN --url https://api.us-east.platform.microblink.com/agent/api/v1/transaction/<transaction_id>
Once the transaction has been deleted, it will no longer show up in the list of transactions in the Transactions tab.
And that's it! In this tutorial, you've successfully:
- Built a workflow.
- Grabbed a token to contact the Agent API.
- Created a transaction.
- Completed the transaction using the Edge API.
- Accessed the details of the transaction.
- Performed a manual verification override.
- Deleted the transaction.